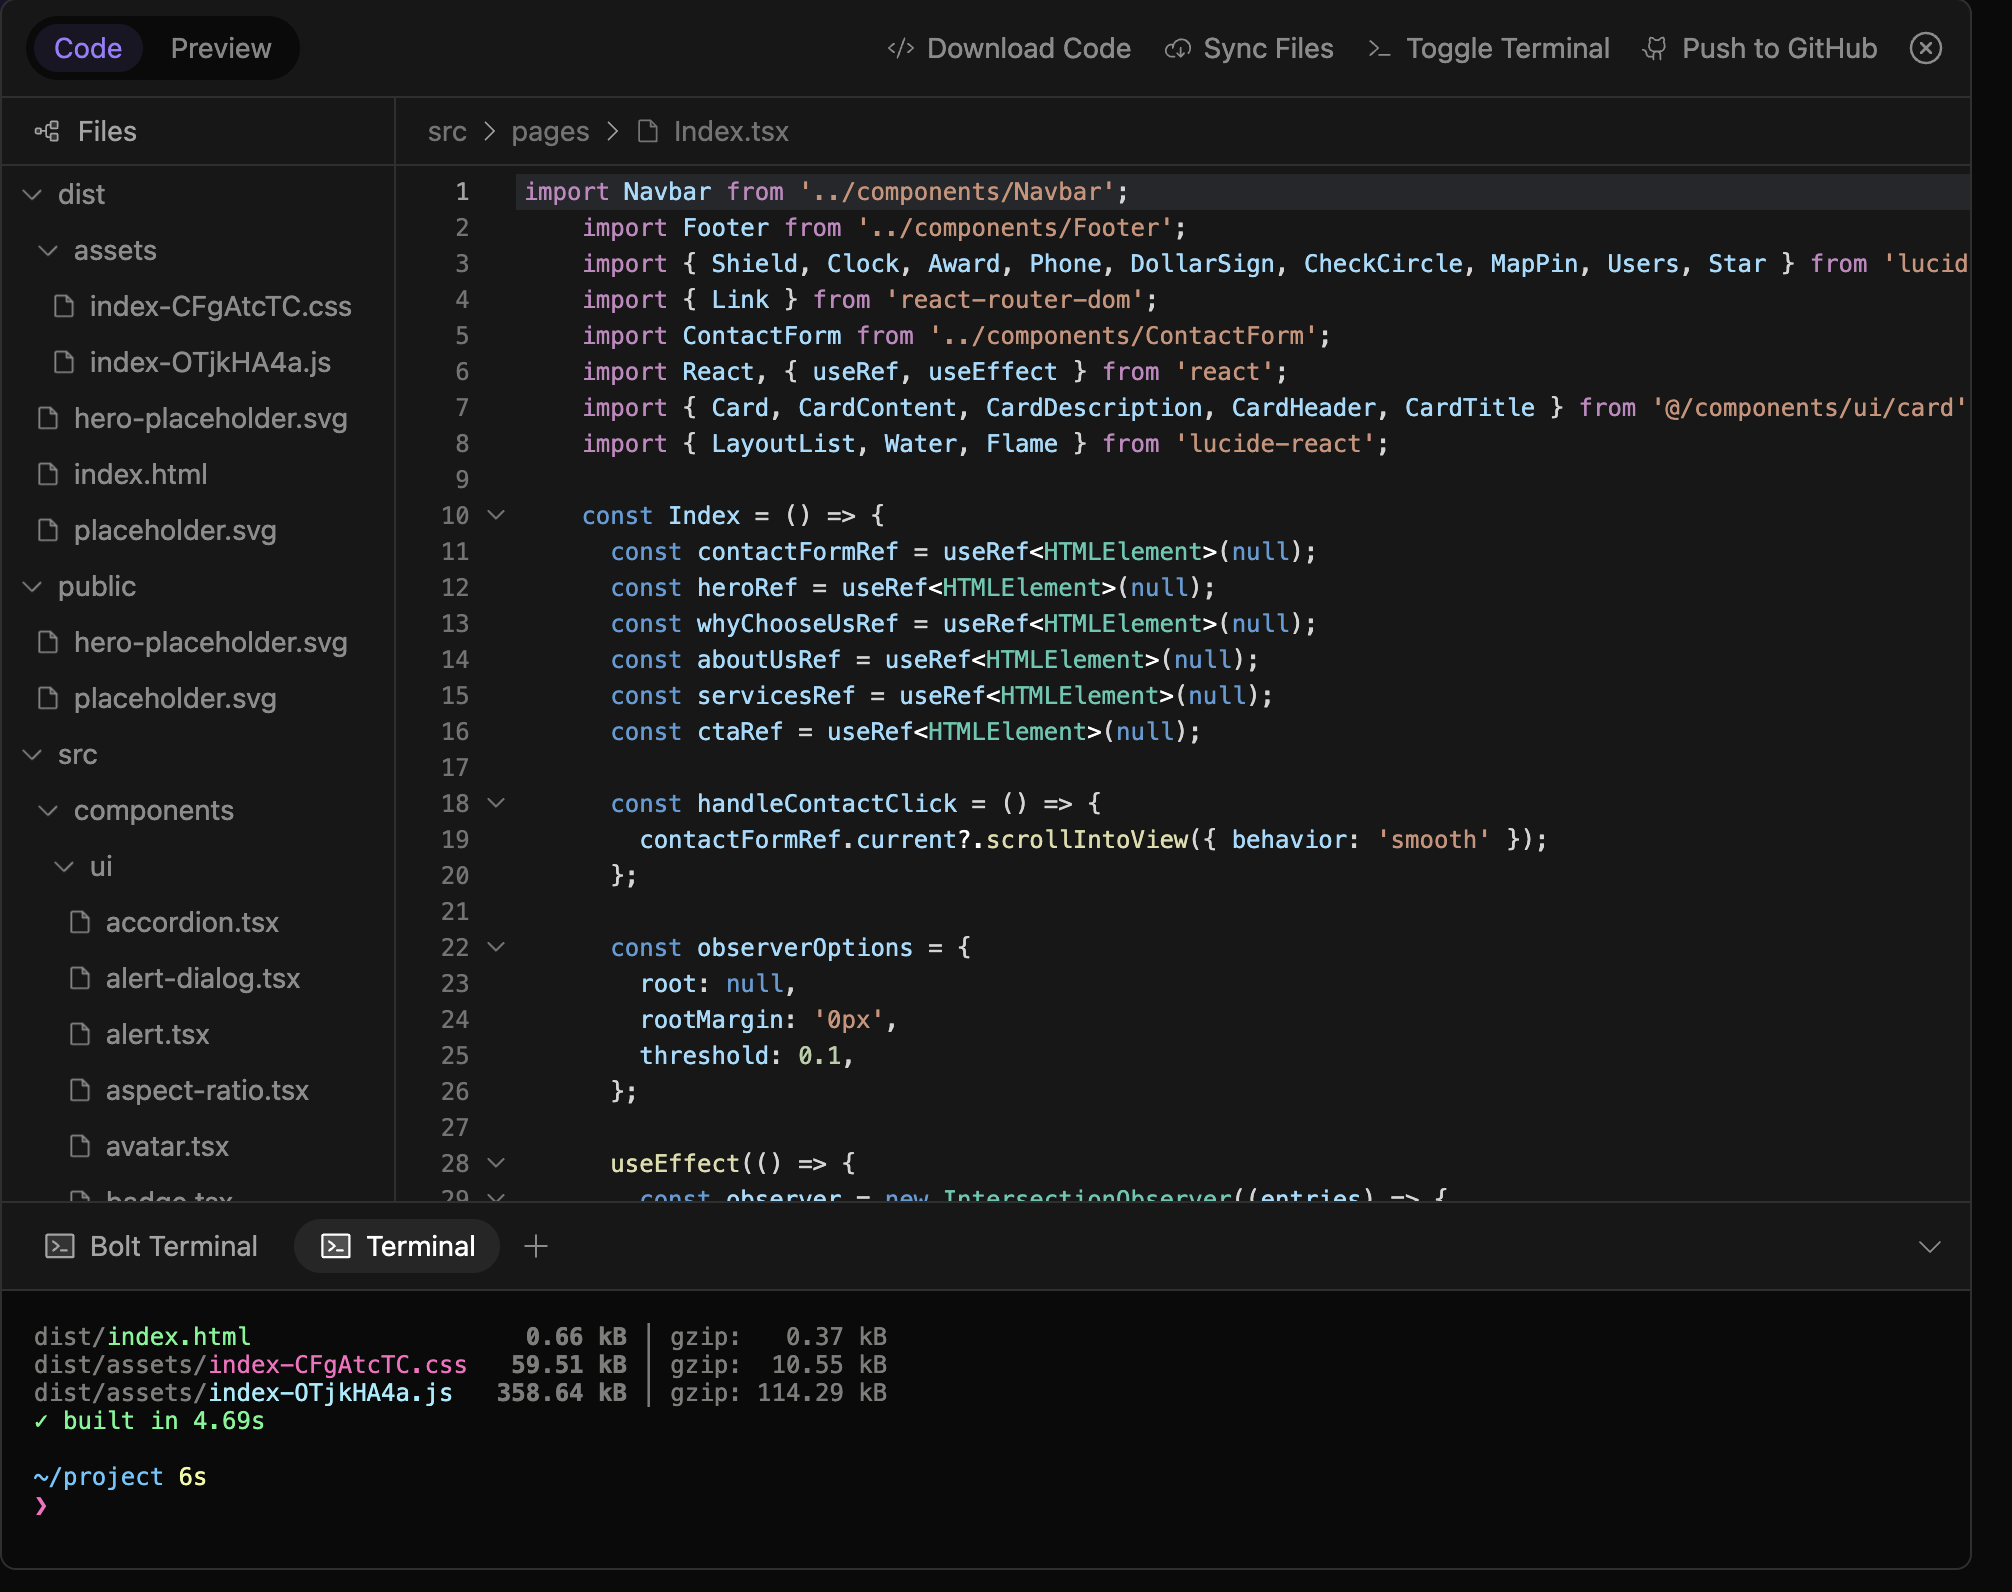
I created a website on Bolt.diy for a local mechanic and he really loved the preview I showed him. I promised him that I’d add photos as well later once I can actually get into the code in GitHub and add them myself.
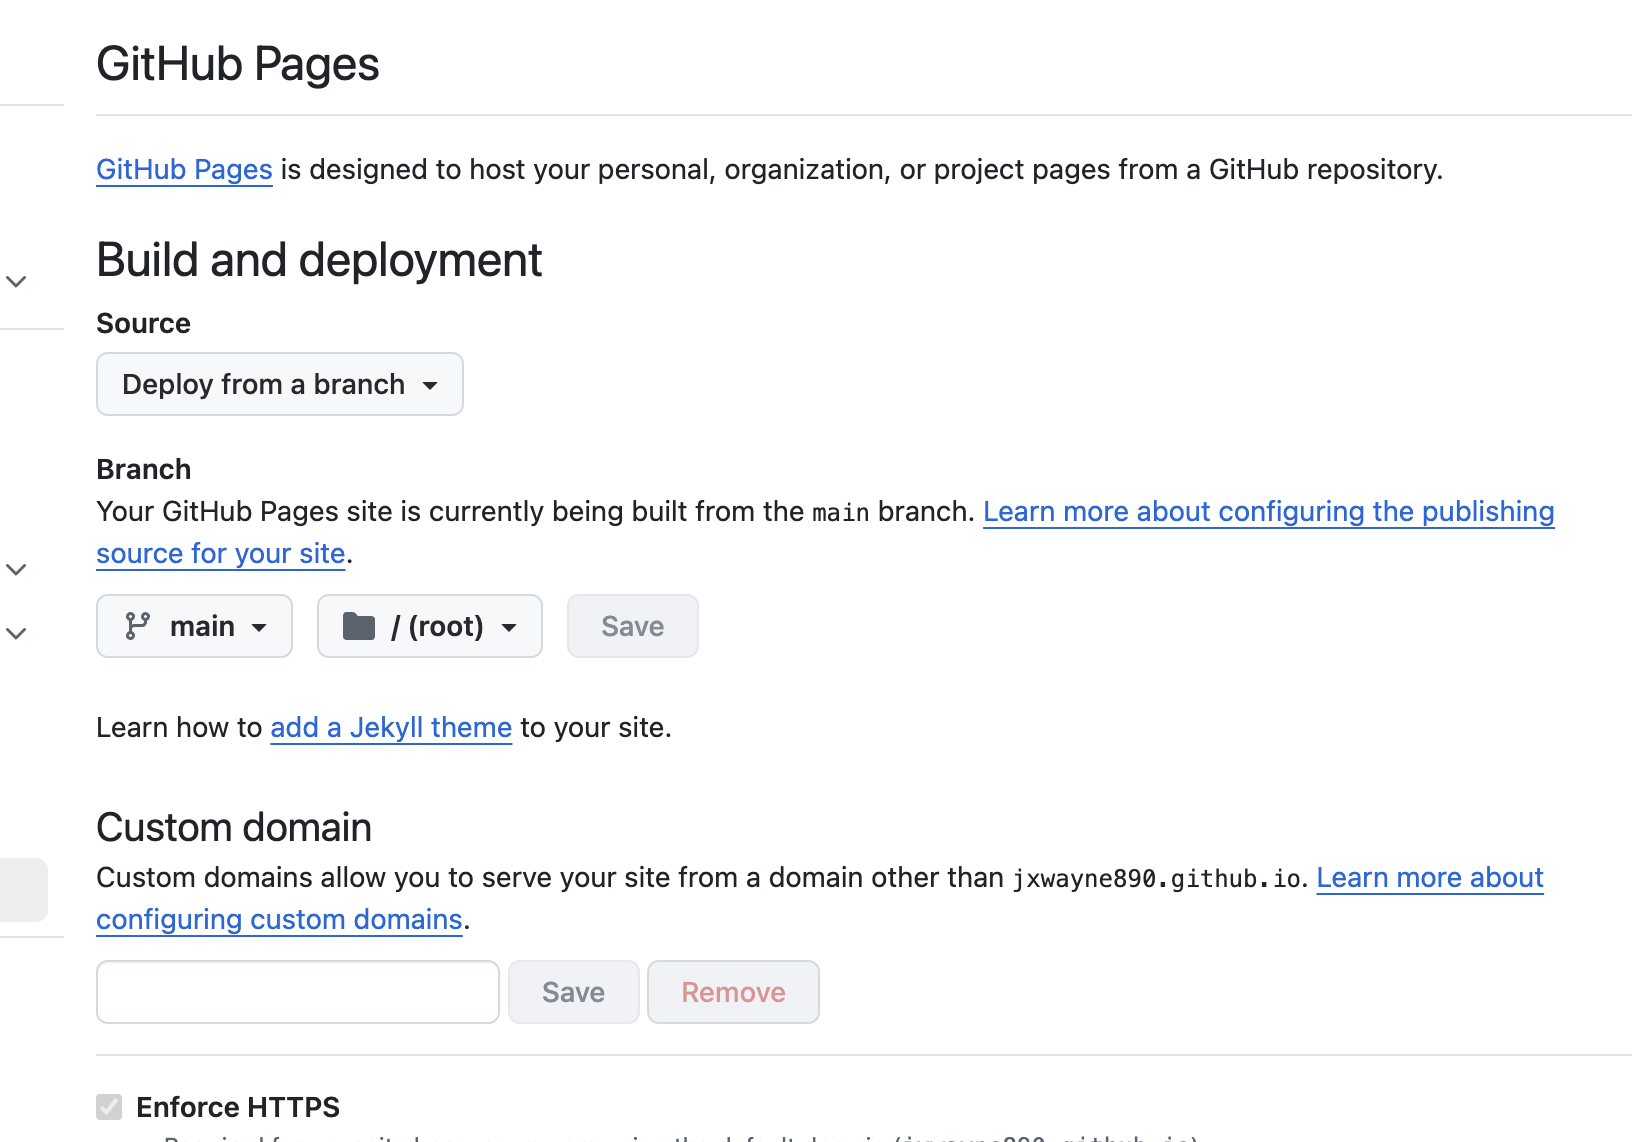
Well now my problem is after getting the dist folder once deploying the project, and upload the files into the root folder in the repo of GitHub, I just cannot for the life of me get the page to populate at all. I just get a black white screen. Every time.
I even tried to upload just the raw files from Bolt.diy and of course it didn’t work.
Am I missing a step somewhere to get this to work?
I wanted to ask you about something you mentioned earlier: “I promised him that I’d add photos as well later once I can actually get into the code in GitHub and add them myself.”
I’ve been trying to add images to the hero section of a site I’m working on, and I’m curious: why do the images need to be added via GitHub? Couldn’t they be added through a simpler method, like a command or by uploading them directly?
I’m still learning and trying to understand the process better. It’s a bit frustrating at times, but I’m enjoying the journey and eager to improve. Any advice or insights you could share would be greatly appreciated!
it´s hard to analyse/find a solution without seeing the problems really.
Can you share the project/git so we can take a look? If you dont want to make it public here, you can also PM me directly and I take a look.
If both not working for you, post at least some Screenshots to help understand what you are doing and what are the problems. Make sure then to open the DEV-Tools (F12 => “Console”-Tab) as well, before taking it.
Hi John, I understand that Bolt.diy doesn’t support direct image uploads, but I’m encountering some challenges even with basic styling.
For example, I’m currently building a small CRM app for a limo company, and I expected that a simple prompt like “make the app modern” would result in a more polished design. However, the output seems quite basic.
See what i mean via this link
Could I be missing something in my Bolt.diy setup, or are there limitations to its styling capabilities that I’m not aware of? I’ve attached a screenshot of the limo app I’m working on for reference.
so i created this template with ChatGPT and its helped me create some really decent looking sites. Of course you have to build upon it and tell exactly what you need afterwards
Paste this template into ChatGPT and instruct it to customize it to your limo service website
Create a sleek, high-end, luxury-level website for [Business Name]. The design should reflect elegance, sophistication, and professionalism. Use advanced design techniques, smooth animations, and minimalist aesthetics to deliver a premium feel. Follow the structure below:
1. Hero Section:
Design a large, full-screen hero section with a subtle video background (if applicable) or a high-resolution, professionally shot image relevant to the business.
Apply a dark gradient overlay for better text contrast.
Use a bold, clean headline with a luxury font (e.g., ‘Playfair Display’ for a serif feel or ‘Poppins’ for a clean sans-serif look), and a soft subtitle in a lighter weight.
Add two premium-styled buttons, with one primary call-to-action button (e.g., “Explore Our Services”) and one secondary button (e.g., “Contact Us”).
Style the buttons with a subtle glassmorphism effect or a gradient (e.g., soft gold to light beige or metallic blue to silver).
Include a hover effect where the buttons smoothly change color and size slightly.
2. Section Transitions & Animations:
Use parallax scrolling effects for the background images in key sections to add depth.
Implement fade-in and slide-in animations with a slight delay to create a smooth, layered reveal effect.
Add a scroll-triggered animation where icons or elements gently scale up or rotate into view as the user scrolls.
3. Services Section:
Use a minimalist grid layout with large, rounded cards that have soft shadows and gradient or lightly textured backgrounds.
Each card should feature:
A premium icon (use line-style icons with a metallic or gold-tone effect).
A clean, bold title in a luxury font.
A short, polished description.
A small button: “Learn More”, styled to match the primary call-to-action buttons.
Add a hover effect where the entire card slightly elevates, and the icon subtly animates (e.g., a light bounce or glow).
4. Portfolio or Gallery Section (if applicable):
Display high-quality images in a masonry grid layout with a lightbox effect for full-size viewing.
Apply a soft zoom-in animation on hover, with a dark overlay and the project title fading in smoothly.
Include a short description or title under each image, styled in a clean, modern font.
5. Testimonials Section:
Use a carousel slider with smooth auto-play and manual controls.
Style the testimonials in elegant quote blocks, with rounded profile images of the reviewers.
Apply a soft fade-in animation for each slide.
Add a light, textured background (e.g., a subtle marble pattern or gradient) for an extra touch of luxury.
6. Color Palette:
Choose a luxury-inspired color palette:
Deep navy, soft gold, and cream for a modern luxury business.
Black, white, and metallic silver for a tech-focused or professional services website.
Warm beige, earthy tones, and soft greens for a wellness or eco-friendly brand.
Ensure a high contrast between text and background while maintaining elegance.
7. Typography:
Use a premium serif font for titles and headings (e.g., ‘Playfair Display’, ‘Merriweather’) combined with a clean sans-serif font for body text (e.g., ‘Lato’, ‘Poppins’).
Apply proper line height, letter spacing, and generous padding for a spacious, clean look.
Ensure text elements have smooth fade-in animations as they scroll into view.
8. Call-to-Action Buttons:
Style buttons with:
Rounded corners.
A subtle gradient or glassmorphism effect.
A hover effect where the button slightly increases in size and the text color changes.
Use micro-interactions, such as a slight pulse or glow when the button is hovered over.
9. Footer:
Design a clean, spacious footer with:
Business contact details, including an address, phone number, and email.
Quick links to key pages.
Social media icons styled with a metallic or gradient effect, and hover animations (e.g., slight color change or size increase).
A copyright notice in a minimalist style.
Add a scroll-to-top button with a subtle hover effect and smooth scroll behavior.
10. Additional Features:
Include a sticky header with a smooth color change or transparency effect as the user scrolls.
Add a floating action button (FAB) in the bottom right corner for key actions, such as “Contact Us” or “Request a Quote”.
Implement smooth page transitions, such as a fade-out and fade-in effect when navigating between pages.
Add subtle background animations, like a slow-moving gradient or particles for a more dynamic feel.
Ensure that all images, icons, and buttons load with a soft fade-in animation to create a premium user experience.
11. Responsive Design:
Ensure the website is fully responsive, with a mobile-first approach.
On mobile:
Stack elements vertically for better readability.
Use touch-friendly buttons and larger fonts for easy interaction.
Maintain all animations but ensure they are smooth and optimized for performance.
12. SEO & Performance Optimization:
Use SEO-friendly meta tags, alt text for images, and structured data.
Optimize images with modern formats (e.g., WebP) for faster loading.
Minify CSS and JavaScript files.
Implement lazy loading for images and videos to improve page speed.
I’m sorry man I’m not really understanding how you mean… I took off the slashes in my index.html like you suggested but its still not working on GitHub