Hello community,
I’m excited to share that I’ve created a Railway.app template for deploying the Bolt.DIY platform.
This deployment template is created directly from the official Bolt.DIY repository, not from any forks or unofficial sources. By using this template, you can quickly spin up a Bolt.DIY instance.
The Railway.app hobby plan includes $5 of free usage per month, which should be more than enough to run a small Bolt.DIY instance.
Here’s a step-by-step guide on how to use the template:
-
Create a Railway.app account: If you haven’t already, sign up for a Railway.app account at Railway.
-
Create a new Railway project: After logging in, click on the “New Project” button to create a new project.
-
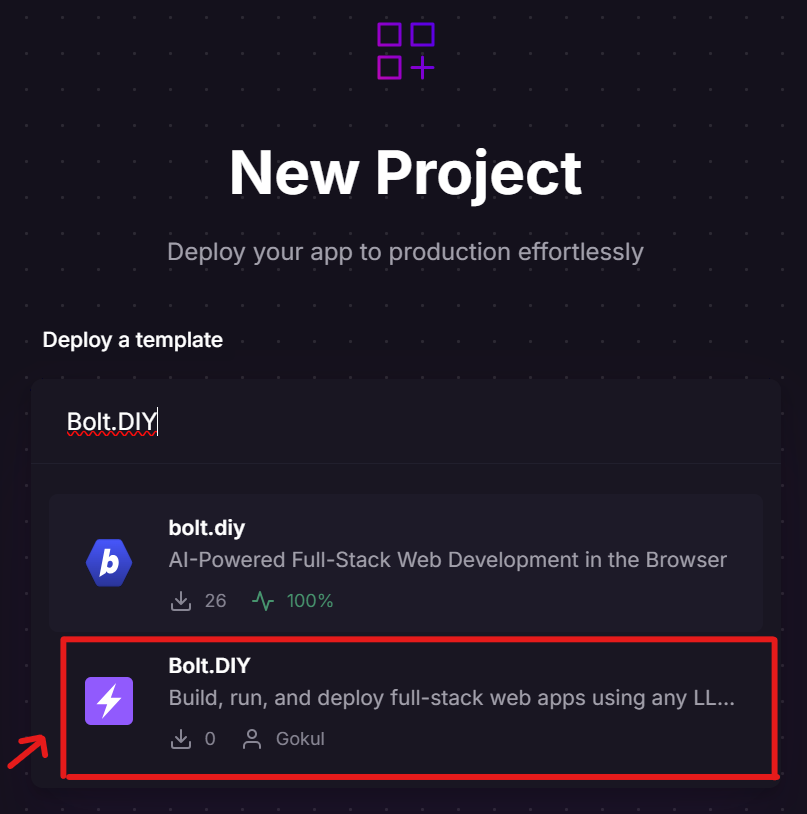
Deploy from the Bolt.DIY template: In the project dashboard, click on the “Deploy a template” and search for “Bolt.DIY”.
In the deployment creation modal, make sure to select the “Bolt.DIY” template specifically, as there may be multiple Bolt.DIY-related templates available.
-
Configure the deployment: Review the template settings and add API keys for the LLMs that you want to use. Once you’re satisfied, click the “Deploy” button.
-
Monitor the deployment: You can follow the deployment progress in the dashboard. Once the deployment is successful, you’ll see the URL where your Bolt.DIY instance is available.
-
Access the deployed Bolt.DIY instance: Once the deployment is complete, you can access the URL shown in the deployment details. This will take you to your Bolt.DIY instance, where you can start using the platform. If you need to troubleshoot or view logs, you can do so from the Railway.app dashboard.
-
Update the deployment: If you need to add or modify any environment variables, you can do so by navigating to the “Variables” tab within your deployment and making the necessary changes. Once you’ve updated the variables, click the “Deploy” button to apply the changes to your running application.
Optional Step
Add Custom Domain:
-
If you want to use a custom domain with your Bolt.DIY deployment, you can do so in the “Public Networking” section of the settings. Enter the desired domain name, select port 5173 and click “Add Domain” to associate it with your application.
-
Adding a custom domain may require additional configuration and DNS settings, depending on your domain provider and the specific requirements of the platform you are using. Be sure to follow the necessary steps to properly configure your custom domain after adding it here.
If you have any questions or need further assistance, feel free to comment.
Happy coding! ![]()